By M. Haroon. Research-based haircut, taper fade, and grooming information, reviewed and updated regularly.
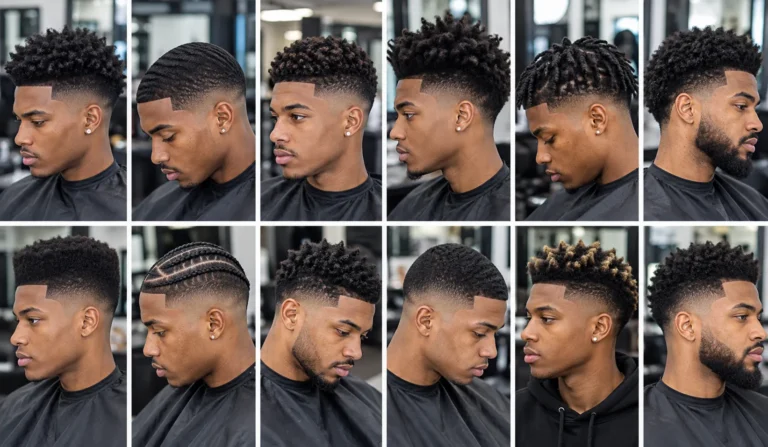
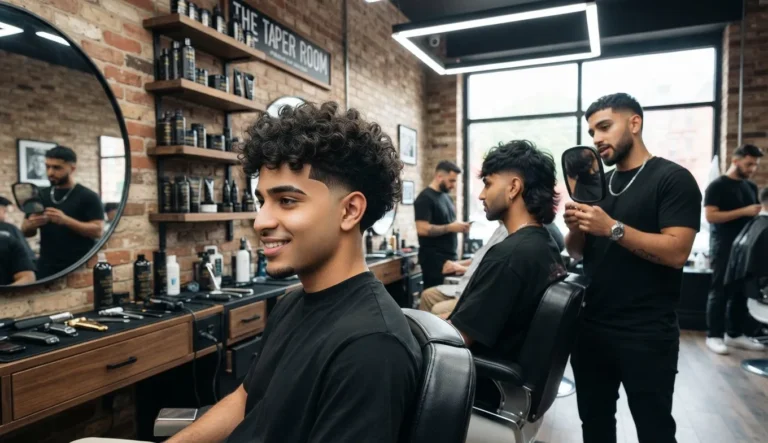
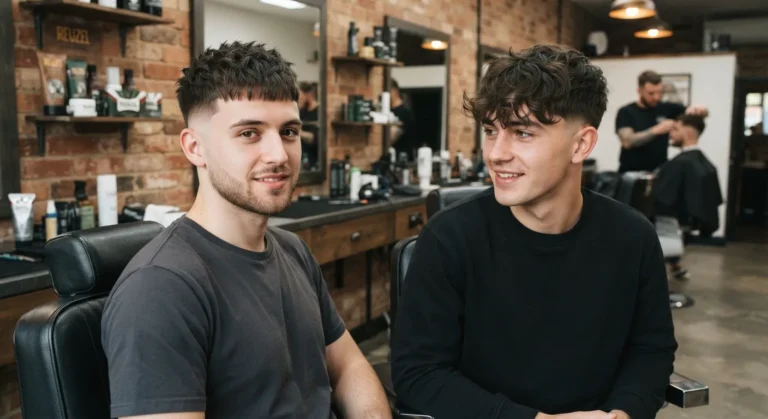
A mid taper fade on curly hair blends the sides starting from the temple, while the curls on top keep their natural length. This cut works across every curl type from loose 2A waves to tight 4C coils but the result depends heavily on shrinkage, taper height, and how well the barber understands your texture. Touch-ups every two to three weeks keep the blend clean, and dry cutting is key to getting accurate length.
There’s no single fixed rule for where a mid taper starts every barber reads it a little differently. Getting it right on curly hair comes down to three things: your curl’s shrinkage rate, the correct guard number on top, and a barber experienced with textured hair.
This guide covers the cut itself, styling variations, cost, a shrinkage chart by curl type, curl care basics, and exactly what to tell your barber before the fade.
Taper vs Fade: It’s About Geography, Not Just the Name
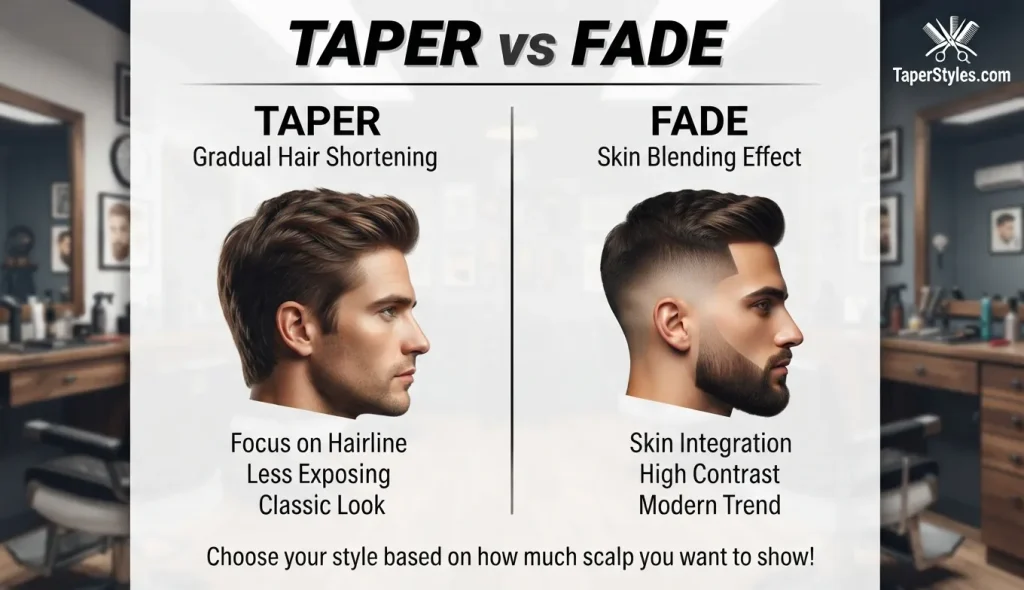
People use “taper” and “fade” interchangeably, but they’re not the same move. A taper keeps the shortest hair concentrated around the sideburns, temple, and neckline, and leaves more length everywhere else on the side. A fade takes a wider section of the side down short, sometimes all the way to skin, in one smooth gradient.
A mid taper fade is both at once. Most of the side gets tapered, then it finishes with an actual fade near the neckline and ear. “Mid” tells you where that starts, roughly at the temple, not how short it ends up at the bottom. You can absolutely ask for a mid taper that stops at a guard length instead of skin. Say that out loud in the chair, because shops don’t default to the same finish.
On curly hair, this geography thing actually matters. Curls push outward and up more than they grow down, so trimming the perimeter cleans up the outline without ever touching the part of the cut that gives it shape. The curly crown stays full, the sides just taper into it.
Mid Taper vs Low Taper vs High Taper
Taper height is really just one variable: where the shortening starts. Move it higher and more side hair comes off, which sharpens the contrast against the curls up top. Move it lower and you keep more weight on the sides with a gentler transition.
| Taper Height | Blend Starts | Side Weight Kept | Contrast |
| Low taper | Near the ear and nape | Most | Subtle |
| Mid taper | Around the temple | Moderate | Moderate |
| High taper | Above the temple | Least | Strong |
Curl Type, Shrinkage, and Porosity
Curl typing runs from 2A, loose waves, up through 4C, tightly packed coils. The classification itself traces back to the Andre Walker Hair Typing System, and curl specialists like Ouidad later built entire cutting methods around curl diameter and density rather than just length. Each type shrinks a different amount once it dries out, and honestly, that’s the single thing barbers get wrong most often on curly hair.
| Curl Type | Pattern | Typical Shrinkage | Top Length Advice |
| 2A to 2C | Loose waves | 10 to 20 percent | Standard guard length works fine |
| 3A to 3B | Springy curls | 20 to 30 percent | Leave slightly extra length |
| 3C | Tight corkscrews | 30 to 40 percent | Ask for a guard size longer than you think you need |
| 4A to 4B | Tight coils | 40 to 60 percent | Dry cutting is not optional here |
| 4C | Densest coils | 50 to 70 percent | Cut dry only, check length after full drying |
Curl Care Vocabulary Worth Knowing
A handful of terms come up constantly once you start reading about curly cuts. Knowing them makes the barber conversation easier and the home routine makes more sense.
Clumping. Individual strands grouping together into defined ringlets instead of separating out into a frizzy halo. Most products are designed to encourage this.
Cast. The stiff, crunchy layer gel or mousse leaves behind once it’s fully dry. Not a mistake, just a stage. You’re supposed to break it on purpose.
Scrunch out the crunch, or SOTC. The step where you scrunch dry, crunchy curls with clean hands until the cast breaks and soft, defined curls show up underneath.
Wash and go. Wash, apply product, let it dry with no other shaping involved. Common on the lower maintenance versions of this fade.
Second day curls. How the pattern behaves a day after washing, once your natural oils redistribute. Some curl types genuinely look better on day two than day one.
Shrinkage. Already covered above, but it’s worth saying again: it’s the biggest reason curly cuts go sideways when a barber hasn’t planned for it.
READ MORE : Mid Taper Fade for Black Male: 22 Best Styles for 2026
15 Mid Taper Fade Styles for Curly Hair
These go from lowest effort to highest, so pick based on how much time you actually want to spend on it each morning, not just what looks good in a photo.
1. Classic mid taper with natural curls.
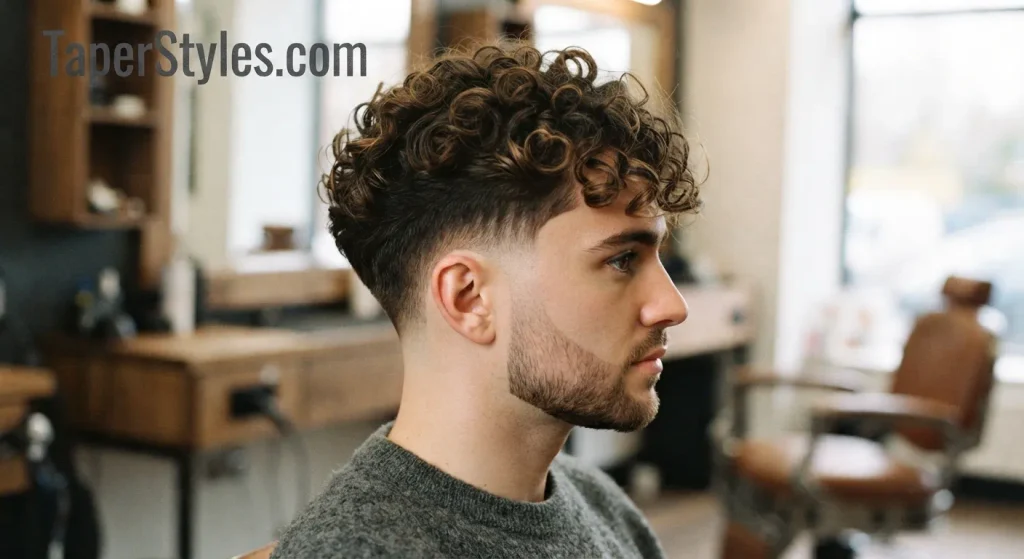
No tricks here. Curls sit at a moderate length and fall however they naturally grow. Safest first request if you’ve never had curly hair professionally faded.
2. Short curly top.
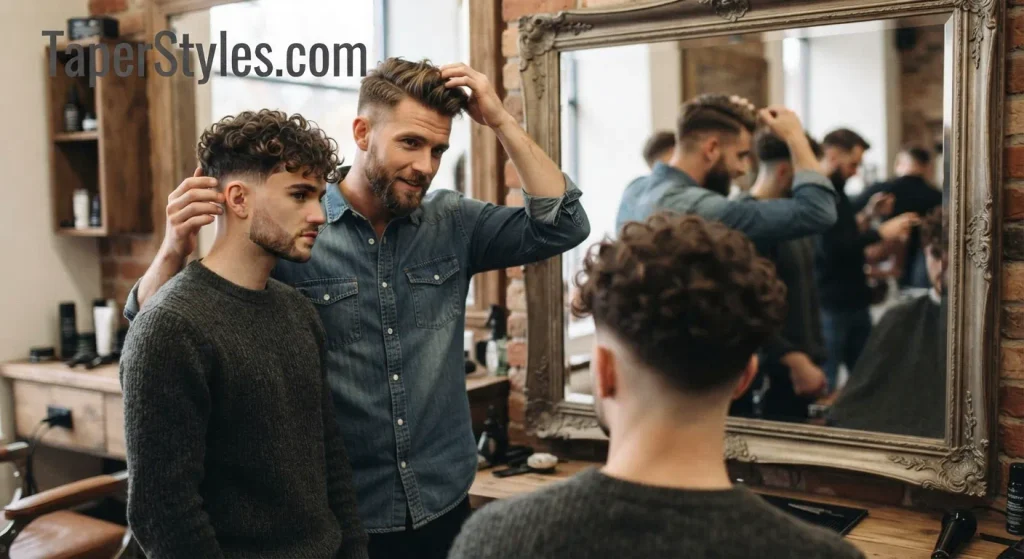
Kept close and low volume for minimal styling effort. Takes just a few minutes to style each morning.
3. Curly buzz cut with mid taper.
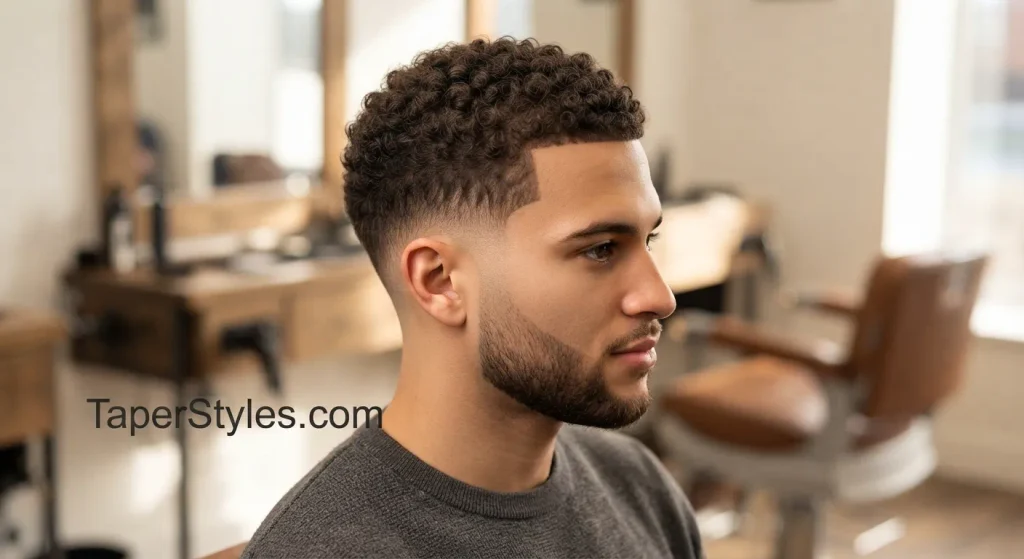
Even shorter. There’s barely room for a full curl pattern to form, but the fade underneath still gives it structure.
4. Textured afro mid taper.
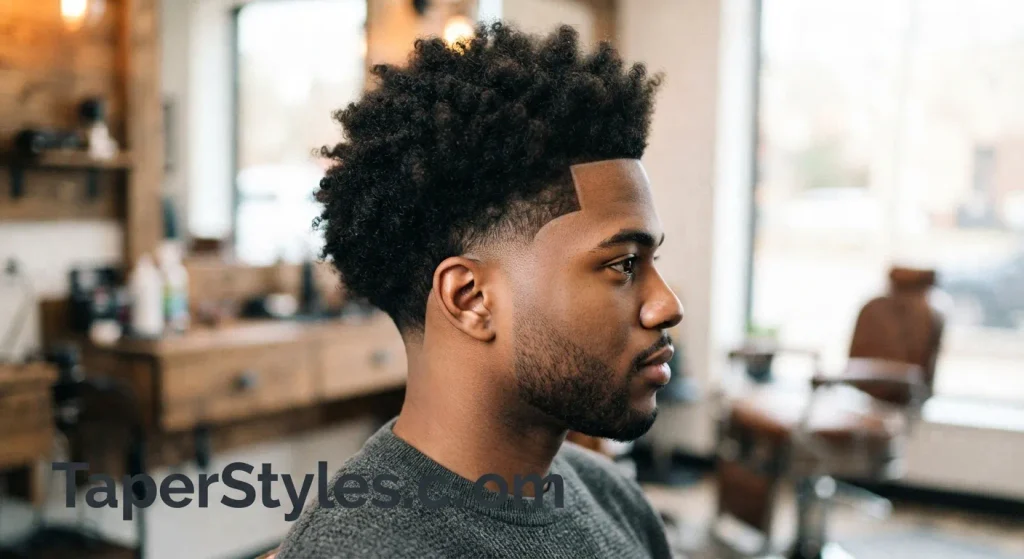
Crown keeps its rounded shape, sides taper clean underneath. One of the more requested cuts for 4A to 4C hair, since the density holds the shape well between trims.
5. Curly fringe with mid taper.
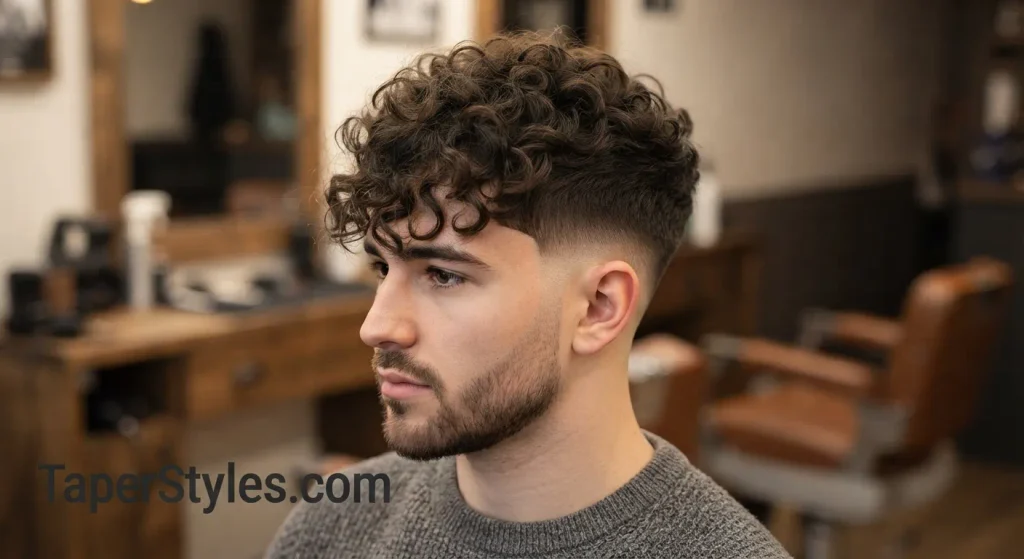
Curls fall forward over the forehead. Works particularly well on heart shaped and square faces, since it softens sharper angles.
6. Curly quiff with mid taper.
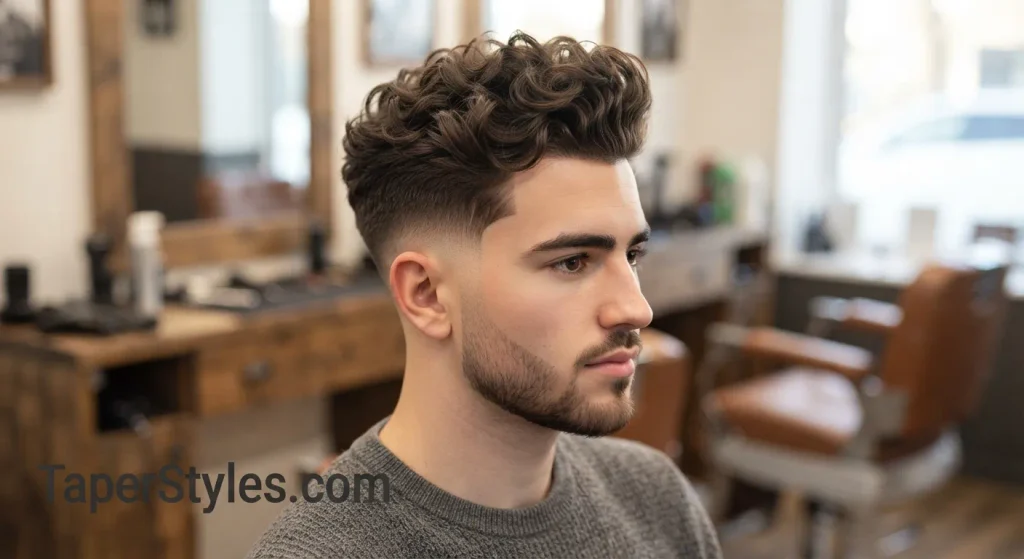
Front lifted and directed back for height. You’ll need a diffuser and a light hold cream, otherwise gravity takes over by afternoon.
7. Blowout mid taper.
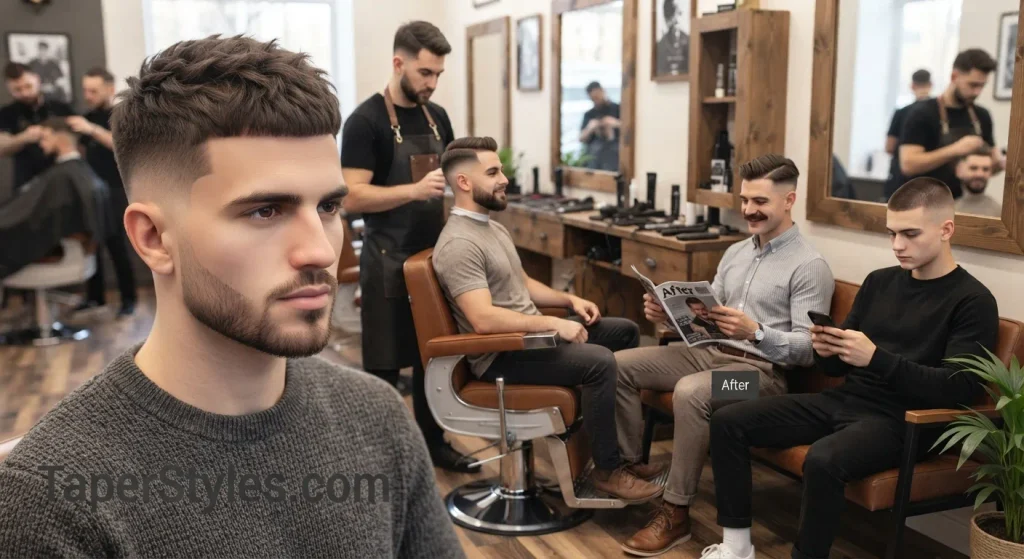
Curls dried outward and up for maximum volume. Best on 3C to 4B density, since finer curl types just don’t have the mass to hold that shape all day.
8. Curly mohawk with mid taper.
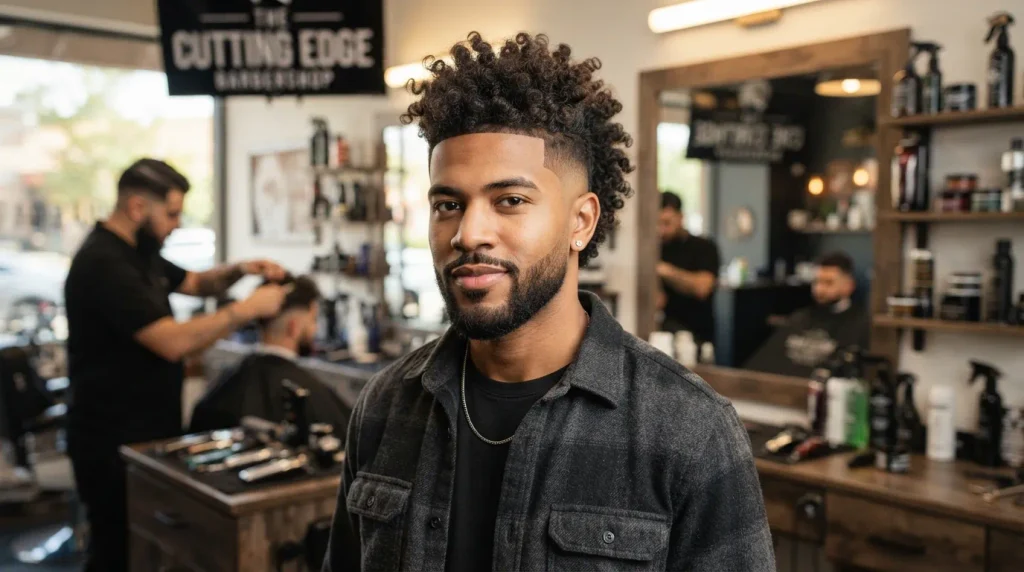
Sides shaved into the fade, a strip of curls down the middle. Bold contrast without needing full afro volume to pull off.
9. Curly undercut with mid taper.
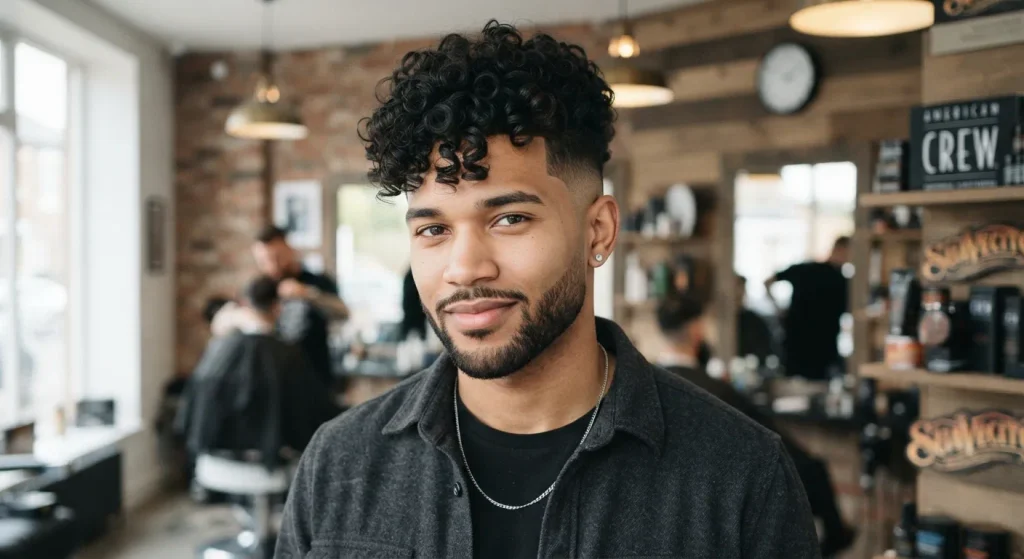
Sharper than a standard taper, curls left a little longer on top for definition at the part.
10. Curly mullet with mid taper.
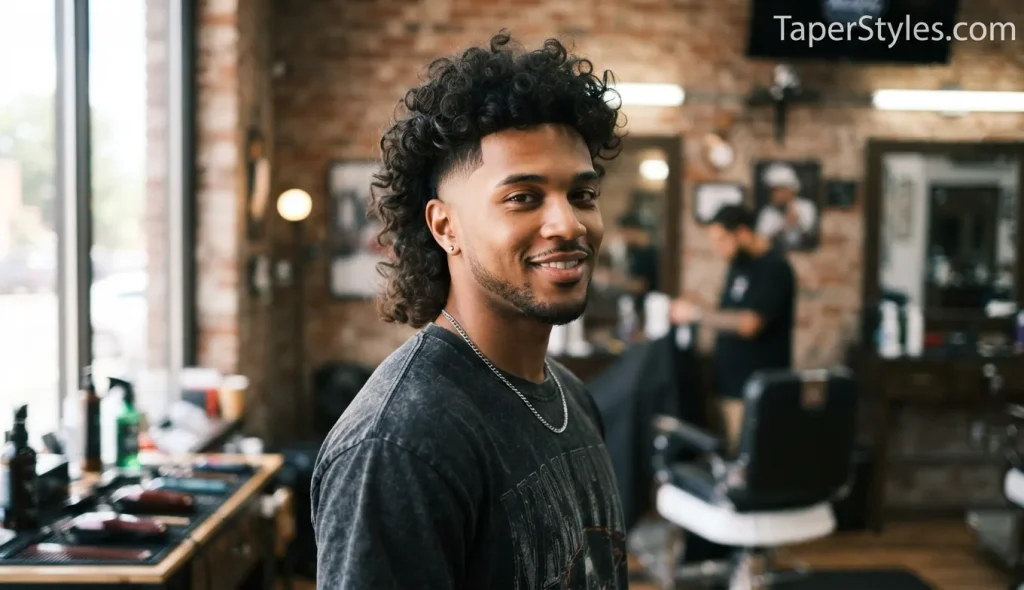
Longer at the back, tapered at the front and sides. This one’s stuck around for a few years now, no sign of it going anywhere.
11. Mid taper with beard blend.
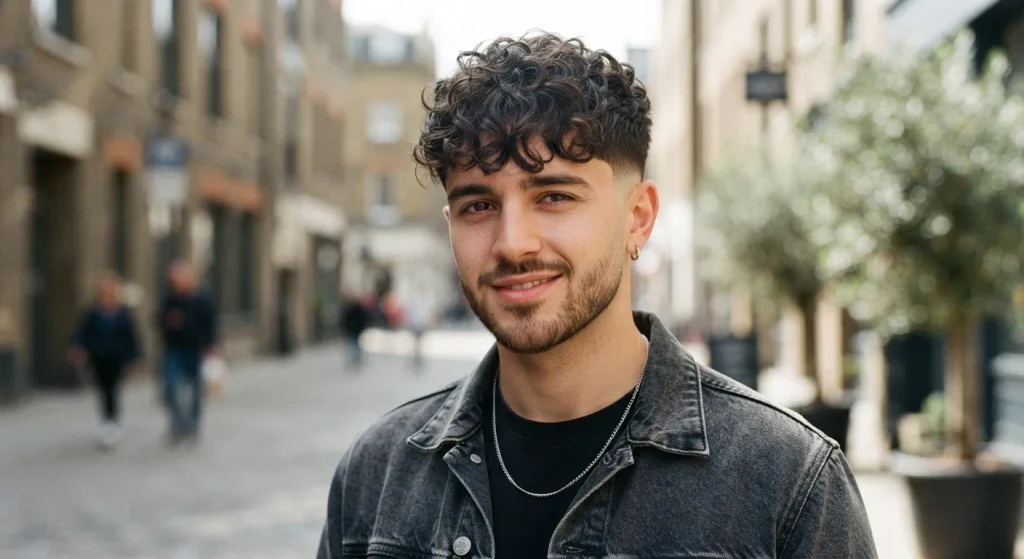
Fade runs straight into a groomed beard instead of stopping at the jaw, so you get one continuous frame. Match the beard taper height to the hair fade height, or you’ll end up with the most common complaint about this style: a visible mismatch.
12. Wet look mid taper.
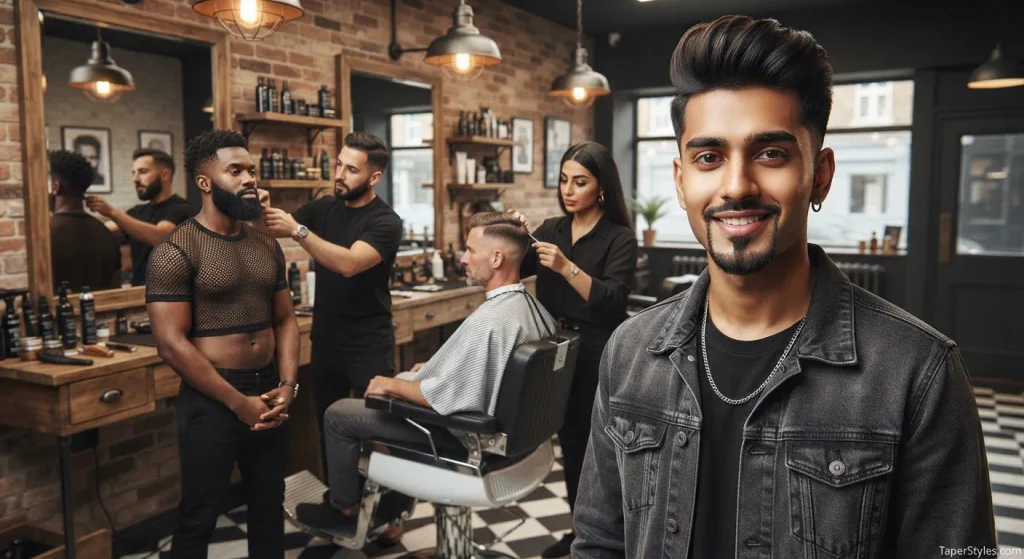
Light gel, glossy finish, right out of the shower. No added volume, just cleaner pattern definition.
13. Line up mid taper.

Sharp, straight edge at the hairline before it blends up into the curls. Adds definition without touching length anywhere.
14. Design detail mid taper.
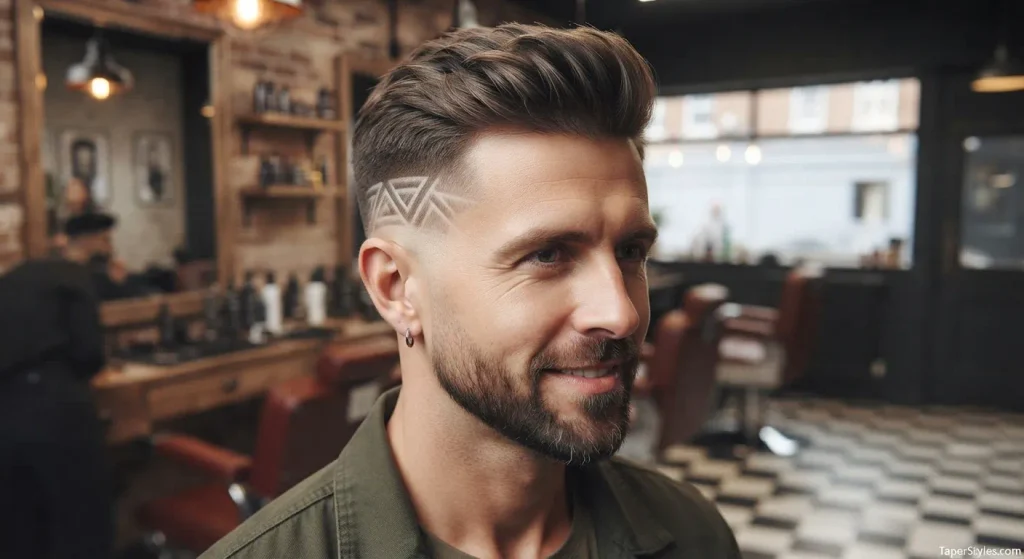
A shaved line or small pattern near where the fade starts to blend. Curls stay the focus, the design’s just an accent.
15. Permed mid taper.
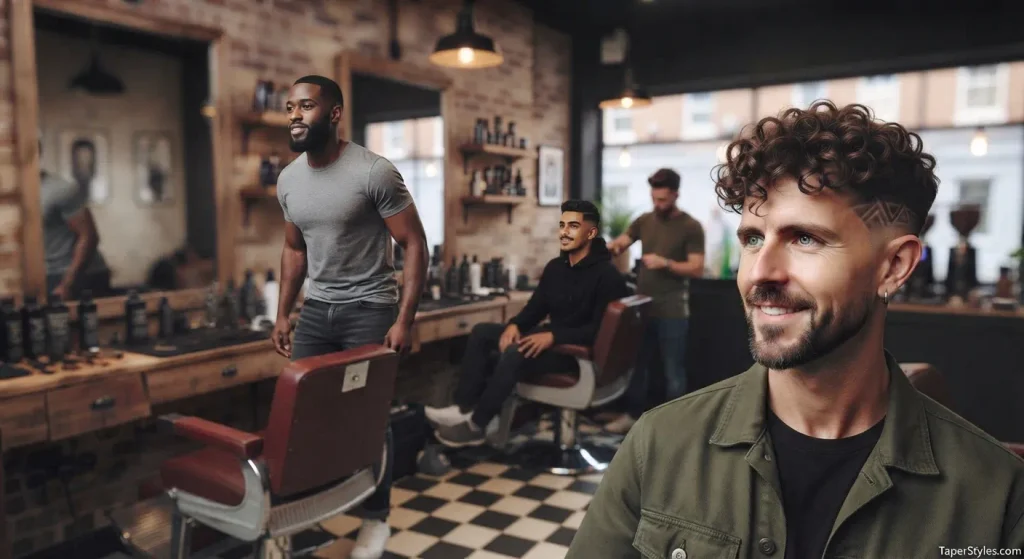
For guys with straight or wavy hair who want curl without waiting for it to grow. The perm creates the texture, the fade keeps it looking deliberate rather than grown out. Give it at least a week after perming before your next fade touch up, since freshly permed curls need time to settle down.
When This Cut Isn’t the Right Call
Most guides skip this part. If your curls run fine and sparse rather than dense, a mid height fade can create more contrast than the top can really support, and the crown ends up looking thin next to it. A low taper is usually the better starting point there. And if you’re growing your curls out long term and don’t want to keep up with regular trims, this cut’s a poor match too. The sides need attention every two to three weeks or the pyramid shape creeps right back in.
READ MORE : Mid Taper Fade Fringe: The Complete Guide 2026
What This Cut Costs
Pricing depends a lot on your region and on how much textured hair experience the barber actually has. Rough US ranges as of 2026:
| Cost Factor | Standard Barbershop | Curly Hair Specialist |
| Per cut | $25 to $45 | $40 to $70 |
| Time in chair | 20 to 30 minutes | 35 to 50 minutes |
| Visit frequency | Every 2 to 3 weeks | Every 2 to 3 weeks |
| Beard blend add on | $10 to $20 | $15 to $25 |
| Rough monthly total | $50 to $90 | $80 to $140 |
How to Talk to Your Barber
A solid brief comes down to five things. Say them close to word for word if you can.
- Fade height. Say “temple level,” not “medium.” Every shop reads medium differently.
- Top guard number. Standard guards: Guard 1 is roughly 3mm, Guard 2 about 6mm, Guard 3 around 10mm, Guard 4 near 13mm. Most curl types that want visible pattern on top do fine with a 3 or 4. Ask to start longer, since it’s easy to go shorter after and impossible to add length back.
- The blend. No visible line where the fade meets the curls, just a smooth gradient.
- Your curl type and shrinkage. Loose 3A versus tight 4B, for example. This gives your barber real technical information before the clippers ever start.
- Neckline shape. Rounded, tapered, or squared off. Decide beforehand, not mid cut.
Before anything starts, ask two direct questions: do you cut curly hair wet or dry, and have you worked with this curl type before. A confident, specific answer is usually a good sign. If the answer is “only wet,” maybe keep looking.
Should Curly Hair Be Cut Wet or Dry?
Dry, most of the time, or some hybrid of the two. Water temporarily relaxes the curl’s spring and stretches the strand out. Cut it at that stretched length and the top ends up shorter than expected once it dries and the pattern bounces back.
Barbers who actually work with textured hair regularly tend to shape the fade and rough length dry first, since that’s the only way to see the true curl pattern from the start. They might dampen small sections for detail work near the hairline, then do one last length check once it’s fully dry. Some curl specialist salons take this further with a curl by curl dry cutting approach, shaping each ringlet individually in its resting state instead of cutting straight across in sections. You don’t need to go that far to get a good result, but the general principle holds: detangle wet, avoid brushing curls dry, and check length after it’s dried.
Mid Taper Fade by Face Shape
| Face Shape | What Helps | What to Avoid |
| Oval | Nearly anything works | No major restriction |
| Round | Height on top, quiff or mohawk | Extra volume on the sides |
| Square | Softer, looser curls on top | A very short, blunt top |
| Heart | Volume near the crown | Width piling up at the temples |
| Long | Width across the sides, mullet or flat top | Too much added height |
| Diamond | Rounded, soft curl shapes | Sharp, angular shaved designs |
Grow Out Timeline
Week 1 to 2. The fade’s at its sharpest here. Skin close areas show the strongest contrast against the curls on top.
Week 2 to 3. Sides start filling back in a bit. Contrast softens, but the shape still reads clean.
Week 3 to 4. The blend line starts to blur, faster if your hair grows quickly. This is when most guys book the next appointment.
Past week 4. The pyramid shape starts sneaking back in as side bulk returns. If you went with a shadow finish instead of full skin, it’ll stay presentable longer into this stretch than a skin close version would.
Styling Routine, Step by Step
- Cleanse with a sulfate free or low sulfate shampoo, every two to three days rather than daily. Curly hair leans on its natural oils more than straight hair does.
- Condition generously, working a moisturizing or deep conditioner from mid length down to the ends, then rinse.
- Apply leave in conditioner while hair’s still soaking wet. This is your moisture base for everything after, and it matters even more if your curls are high porosity and lose moisture fast.
- Curl cream, mousse, or a light gel next, depending on how much hold you’re after. Defines the pattern, keeps frizz down. Skip heavy silicones unless you’re washing daily, since they build up otherwise.
- Dry with a diffuser on low heat, or just let it air dry. Scrunch upward as you go. Pulling down flattens the pattern exactly where the fade needs it to stay full.
- Scrunch out the crunch once it’s fully dry, working the cast loose with clean, dry hands until curls feel soft instead of stiff.
Wash less than you’d think you need to. Curly hair holds onto natural oils longer than straight hair, so two to three washes a week is usually plenty. Wash daily and you’ll strip the oil that keeps curls defined, which just leads to more frizz.
Product Checklist
| Product | Purpose | When to Use |
| Sulfate free shampoo | Cleanses without stripping natural oils | Wash day, every 2 to 3 days |
| Deep conditioner | Restores moisture, improves elasticity | Weekly |
| Leave in conditioner | Moisture base layer | Right after washing, on damp hair |
| Curl cream | Defines pattern, controls frizz | After leave in, before drying |
| Light hold gel or mousse | Extra hold for quiffs or blowouts | Optional, on top of curl cream |
| Texture clay or pomade | Structured finishing for quiffs and side parts | On dry hair, final step |
| Diffuser attachment | Faster drying, more volume | During drying |
| Curl refresh spray | Revives pattern between washes | Day 3 or 4 after washing |
| Edge control | Cleans up the hairline | Between barber visits only |
Maintenance Between Visits
The fade and the curls basically run on two different clocks. The fade needs a barber every two to three weeks to stay sharp, since the sides always outgrow the top. A skin close fade blurs faster than a soft shadow one does. If your barber left a light shadow instead of going all the way to the skin, you can usually stretch closer to four weeks between visits.
At home, sleep on a satin or silk pillowcase. Cotton pulls moisture right out of curls overnight and leaves them dry by morning, satin just doesn’t do that. For longer curls, try the pineapple method, gathering them loosely on top of your head before bed instead of letting them get crushed flat all night. Use edge control only along the hairline between cuts, and a light refresh spray on day three or four brings the pattern back without a full wash.
Common Mistakes That Wreck This Cut
Cutting the top too short while it’s wet. Probably the single most common complaint from curly haired clients. Fix is simple: ask for a dry cut, every time, no exceptions.
Brushing dry curls. Breaks curl clumps apart into frizz. Only detangle wet or conditioned hair.
Letting the fade grow past three weeks. The sides catch up to the top and the whole contrast that makes this cut work just disappears.
Skipping leave in before styling. Dry, unprotected curls frizz by midday regardless of how clean the cut was.
Ignoring porosity. Same amount of product on low versus high porosity curls leads to either buildup or dryness. Adjust based on how fast your hair takes in and loses moisture.
Bringing the wrong reference photo. A photo of loose 2C waves won’t translate onto 4B coils. Shrinkage and volume behave too differently between the two.
Washing too often. Daily washing strips oils that curly hair depends on more heavily than straight hair does.
Alternatives If Mid Isn’t Right
Low taper. More length kept on the sides, a more conservative look overall.
High taper. More hair removed, sharper contrast against the curls on top.
Drop fade. Curves around the ear instead of running straight, a more distinct shape.
Burst fades. Arcs in a half circle around the ear while the back stays longer.
Frequently Asked Questions
What’s the difference between a mid taper fade and a mid fade?
A mid taper keeps more hair on the sides, while a mid fade removes more side hair and creates a wider, stronger gradient.
Is a mid taper fade good for curly hair?
Yes, a mid taper fade works well with curly hair because it cleans the sides while keeping natural curl volume and texture on top.
Can you get a mid taper without going down to the skin?
Yes, you can request a shadow or guard-length finish instead of skin. Tell your barber exactly how short you want the sides.
Should curly hair be cut wet or dry?
Curly hair is often better assessed and shaped dry because shrinkage can change its apparent length once the curls return to their natural pattern.
Is a low taper or mid taper better for curly hair?
A low taper keeps more side weight for a subtle look, while a mid taper creates stronger contrast and sharper definition around curly hair.
Does this cut work on afro-textured hair?
Yes, a mid taper can work well on afro-textured hair, including tightly coiled curls, when the barber accounts for density and shrinkage.
How often should you get a mid taper fade touch-up?
Most people need a touch-up every two to three weeks to keep the taper clean, although growth rate and fade length affect timing.
How much does a mid taper fade cost?
A mid taper fade commonly costs about $25 to $70 in the US, depending on location, barber experience, hair texture, and additional services.
conclusion
A mid taper fade with curly hair is all about letting your curls shine while cleaning up the sides, ears, and neckline. It works for almost any curl type loose waves or tight coils but the cut really needs to follow how your hair naturally grows. Don’t forget shrinkage either; hair often looks longer when wet and shrinks up once it’s dry. And the taper height matters a lot too go mid, and you get sharper, more noticeable contrast on the sides.
To keep it looking fresh, plan on seeing your barber every two to three weeks, along with gentle washing, conditioning, and good curl products at home. Before you sit in the chair, be clear about your taper height, how much length to keep on top, and your neckline style bringing a photo helps a ton.